Give your old dresser a fresh look by using peel-and-stick wallpaper. First, assess the dresser’s condition and sand any rough patches. Lightly prime the surface for better adhesion, then carefully measure and cut the wallpaper to fit each panel. Smooth out air bubbles with a credit card as you go. Replace any outdated hardware for a modern touch. With these simple steps, you’ll transform your furniture—stick around to discover helpful tips to perfect your makeover!
Key Takeaways
- Clean and lightly sand the dresser surface to ensure proper wallpaper adhesion.
- Measure and cut peel-and-stick wallpaper precisely to fit each dresser panel.
- Peel backing and smooth the wallpaper from center outward, using a squeegee or credit card to remove bubbles.
- Reattach or replace hardware after wallpaper application for a polished look.
- Finish by inspecting the dresser and making any final adjustments for a seamless transformation.
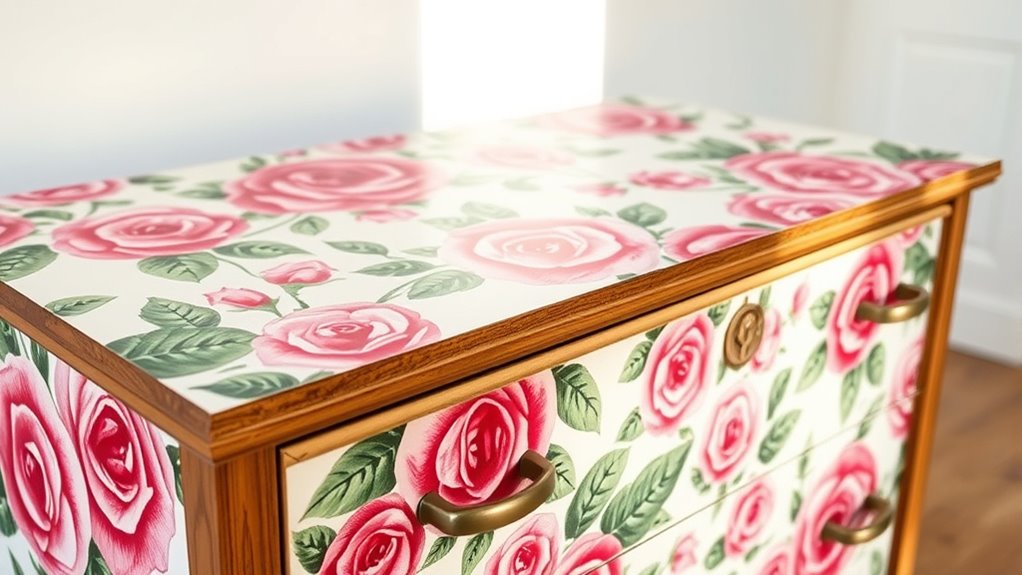
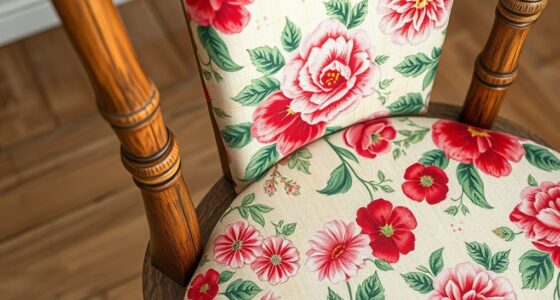
Ever considered giving an old dresser a fresh new look? If so, you’re about to discover a simple yet transformative way to breathe new life into your furniture. One of the most effective methods is using peel-and-stick wallpaper, which instantly updates the piece without the mess of traditional wallpapering. Before you start, take a good look at the dresser’s current condition. If the paint is chipped or peeling, you’ll want to address that first. This is where painting techniques come into play. Light sanding can smooth out rough patches, and applying a primer ensures better adhesion for your new wallpaper or paint. If you prefer a different look, consider painting the dresser entirely — a solid color or even a fun pattern can make a big difference. But for a quick, stylish update, peel-and-stick wallpaper is a game-changer.
Once you’ve prepped the surface, focus on hardware replacement. Old knobs and handles can date the piece, even if the rest looks good. Swapping out these small details is a cost-effective way to modernize your dresser. Choose hardware that complements your new decor style—brushed gold, matte black, or vintage glass knobs are popular options. Removing the old hardware is straightforward; most knobs are held in place with screws, which you can unscrew with a screwdriver. Clean the surface around the holes before attaching your new hardware, and make sure everything lines up evenly for a polished finish. This small step can elevate the entire look and feel of the dresser, making it feel fresh and new.
When applying the peel-and-stick wallpaper, measure carefully and cut panels that fit precisely. Peel off the backing and smooth the paper onto the surface, working from the center outward to eliminate air bubbles. Use a squeegee or a credit card to press out any wrinkles. Take your time to align the pattern if you’re using patterned wallpaper, ensuring a seamless look. The beauty of peel-and-stick wallpaper is that it’s forgiving; if you mess up, you can gently peel it back and reposition it. Additionally, understanding the energy-efficient qualities of modern wallpaper materials can help you choose options that are both stylish and sustainable. Once the wallpaper is in place, reattach the hardware, and step back to admire your handiwork. You’ll be surprised how a few simple techniques—painting, hardware swapping, and wallpaper application—can turn an outdated piece into a stunning focal point in your home.

15.7" X 118" Black Silk Wallpaper Embossed Self Adhesive Peel and Stick Wallpaper Contact Paper Removable Waterproof Kitchen Vinyl Wrap Cabinet Furniture Textured Renter Friendly Wall Gift Paper
Black Wallpaper–Embossing Process- It can effectively reduce the generation of bubbles. The solid color gives the room a…
As an affiliate, we earn on qualifying purchases.
As an affiliate, we earn on qualifying purchases.
Frequently Asked Questions
How Long Does a Peel-And-Stick Wallpaper Dresser Makeover Typically Last?
A peel-and-stick wallpaper dresser makeover usually lasts around 3 to 5 years, depending on durability concerns and usage. To extend its life, you should avoid excessive moisture and direct sunlight. Maintenance tips include gently cleaning with a damp cloth and avoiding harsh chemicals. Proper application and occasional touch-ups can also help keep the wallpaper looking fresh longer, ensuring your dresser stays stylish and vibrant for years to come.
Can Peel-And-Stick Wallpaper Be Removed Easily Without Damage?
Imagine you’re a 21st-century DIY hero, and yes, peel-and-stick wallpaper can be removed easily without damage. To do so, start with surface preparation by gently peeling back the edges and applying heat with a hairdryer to loosen the adhesive. Use a plastic scraper and a bit of rubbing alcohol for residue, ensuring the surface stays intact. With patience, your dresser will look fresh and damage-free, ready for a new style.
What Tools Are Recommended for Applying Peel-And-Stick Wallpaper?
You’ll want a sharp scoring tool to create tiny perforations, helping air bubbles escape during application. A smoothing brush is essential to press the wallpaper firmly, ensuring a smooth, bubble-free finish. Keep a utility knife handy for trimming edges and corners. Use a level or straightedge for alignment. These tools make applying peel-and-stick wallpaper easier, helping you achieve a professional look on your dresser or any other surface.
Is Peel-And-Stick Wallpaper Suitable for High-Humidity Areas?
Wondering if peel-and-stick wallpaper can survive in high-humidity spaces? Yes, it can, but only if you choose moisture-resistant varieties. These are specially designed for bathroom suitability and other damp areas. Keep in mind, proper installation and sealing are key to preventing peeling. So, if you pick the right type and take precautions, your wallpaper can withstand moisture and add a fresh look to your humid space.
How Do You Fix Bubbles or Wrinkles During Installation?
If you notice air bubbles or wrinkles during installation, don’t panic. Use a squeegee or a credit card to gently smooth out the bubbles, starting from the center and working outward. For stubborn wrinkles, lightly lift the wallpaper and reapply, smoothing as you go. Proper wrinkle smoothing and careful bubble removal guarantee a sleek, professional finish on your dresser makeover.

khtumeware 10 Pack Cabinet Knobs Black Kitchen Cabinet Knobs Round Dresser Drawer Knobs Matte Black Drawer Pulls Closet Door Knobs 1-1/5 Inch
Product size: Round Cabinet Knob, Top Diameter: 1.18inch(30mm); Base Diameter: 0.5in (15mm); Height: 0.86 inch(22mm).
As an affiliate, we earn on qualifying purchases.
As an affiliate, we earn on qualifying purchases.
Conclusion
With just a few simple steps, you’ve transformed a tired old dresser into a stunning centerpiece. Peeling and sticking wallpaper breathes new life into your furniture, proving that creativity can turn the ordinary into extraordinary. Think of it as giving your space a fresh new chapter—one peel at a time. So go ahead, embrace the DIY magic and let your imagination run wild. After all, your home deserves a little renovation romance!

TECKWRAP Professional Squeegee Tool for Vinyl Decals, Inkjet Vinyl Sticker Paper,and Wallpaper – 6"x2.9", Scratch-Free Application (Pitaya)
Multipurpose Smoothing Tool: TECKWRAP plastic squeegee is your go-to tool for a wide range of applications, including adhesive…
As an affiliate, we earn on qualifying purchases.
As an affiliate, we earn on qualifying purchases.

Jungarian Furniture Paint Kit 16oz with Tools – Water-based & Low Odor No Sanding No Priming- Matte Finish Indoor Outdoor Wood Paint for Cabinets, Doors, Tables and Dressers – Black
【Use Freely Furniture Paint】No need for time-consuming polishing or primer, our wood one step paint can be directly…
As an affiliate, we earn on qualifying purchases.
As an affiliate, we earn on qualifying purchases.