To create a geometric accent wall with tape, start by choosing a bold or subtle color scheme that complements your room. Measure and sketch your pattern, then tape off sections carefully for clean lines. Apply your base color first, let it dry, and then use painter’s tape to outline your shapes—stripes, triangles, or diamonds—before painting each section. Removing the tape at the right moment guarantees crisp edges. Keep exploring for step-by-step tips to master your DIY geometric wall design.
Key Takeaways
- Select a bold color scheme and plan your geometric pattern to ensure visual impact and cohesion.
- Measure the wall carefully, sketch your pattern, and use painter’s tape to outline shapes precisely.
- Paint the wall with a base color, then apply tape along pattern lines, pressing firmly to prevent bleed.
- Paint each section with your chosen colors, removing tape before it dries for sharp, clean edges.
- Arrange furniture and decor to enhance the geometric design, creating a balanced and stylish accent wall.
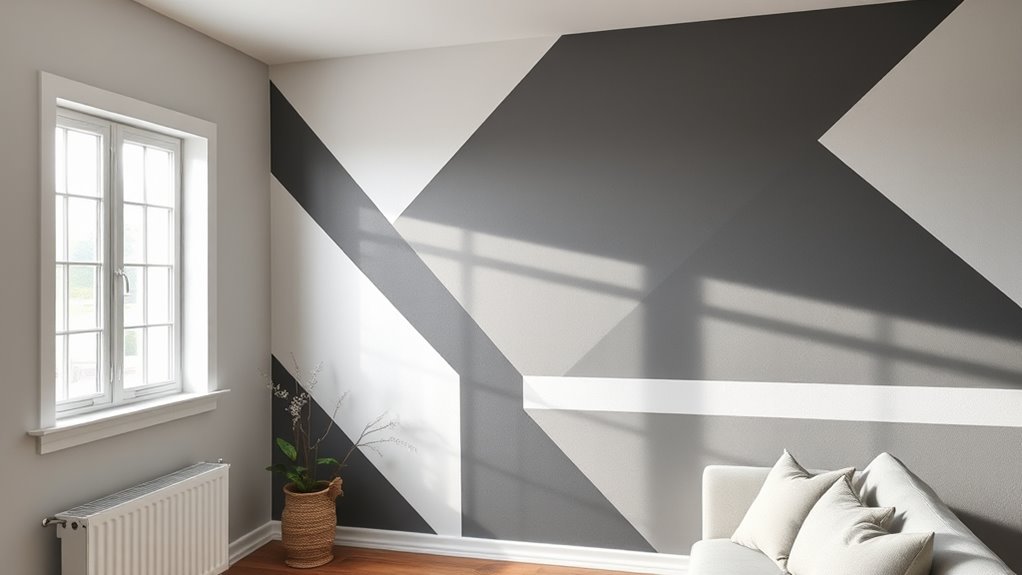
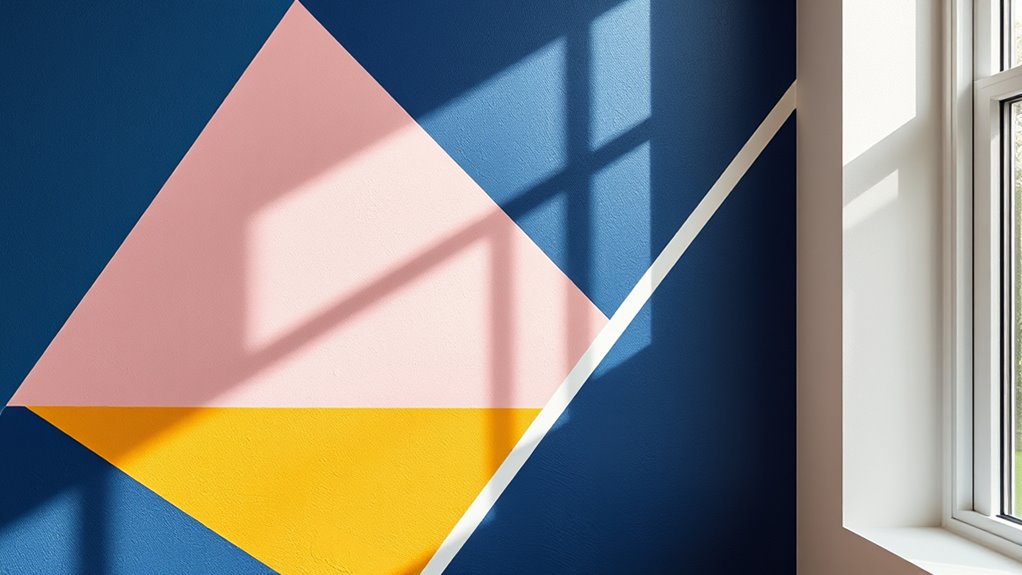
Creating a geometric accent wall is a fun and budget-friendly way to transform any room in your home. With a little planning and some basic supplies, you can add a bold, modern touch that elevates your space. The key is choosing the right color schemes and considering furniture placement to make your design pop. First, think about the mood you want to create. Bright, contrasting colors like navy and white or bold shades like mustard and charcoal can make a striking statement. If you prefer a more subtle look, opt for pastel tones or monochromatic schemes with slight variations in hue. Once you settle on your color palette, decide where the accent wall will go to maximize impact, often the largest or most visible wall in the room.
Create a bold accent wall with thoughtful color choices and strategic furniture placement.
Next, measure your wall carefully and sketch out your pattern on paper. Geometric designs can range from simple triangles and stripes to complex hexagons or diamonds. Keep your pattern manageable to ensure precise execution. Gather painter’s tape in various widths to help create clean lines, angles, and shapes. When applying tape, press down firmly to avoid paint bleed and ensure crisp edges. Use a level or a straightedge for straight lines, and take your time aligning the tape accurately. Remember, the goal is symmetry and precision, so double-check measurements before sticking the tape.
Before painting, prepare the wall by cleaning and priming it if necessary. Paint the entire wall with your base color and let it dry completely. Once dry, apply the tape according to your pattern. For multi-color designs, you’ll typically paint one section at a time, removing the tape carefully before the paint dries to prevent smudging. Use quality brushes for touch-ups if needed, and consider using painter’s tape for sharp edges rather than freehand painting. Incorporating paint technology can help achieve more durable and crisp lines, especially in high-traffic areas.
As you finish, think about your furniture placement to complement your new geometric design. Arrange your furniture to highlight the accent wall, keeping larger pieces away from the wall to avoid covering the pattern. Light-colored or neutral furniture works well with bold patterns, but if your wall features softer hues, darker furniture can create a balanced, cohesive look. Incorporate accessories like throws, pillows, or artwork that echo your color scheme to tie the room together. With patience and attention to detail, you’ll create a stunning feature wall that’s uniquely yours, all while sticking to your budget and enjoying the process.
Frequently Asked Questions
What Types of Tape Are Best for Clean Lines?
You should use painter’s tape for clean lines because it sticks firmly and peels away easily without damaging the paint. Washi tape is also a good option if you want a less sticky, decorative look, but it might not give as sharp a line as painter’s tape. For the best results, choose painter’s tape designed for walls, and make sure you press down the edges well before painting.
How Do I Fix Mistakes Without Ruining the Design?
Think of fixing mistakes like editing a rough draft—you don’t need to start over. To correct errors, gently do paint touch ups with a small brush, blending edges carefully. When removing tape, use slow, steady pressure and follow tape removal tips like pulling at a 45-degree angle. This preserves your design’s clean lines, just like polishing a gem, ensuring your geometric wall looks sharp and intentional.
Can I Use Multiple Colors in One Pattern?
Yes, you can definitely use multiple colors in one pattern. To guarantee a cohesive look, focus on color coordination by choosing shades that complement each other. Keep pattern complexity in mind; simpler designs work best with multiple colors, while intricate patterns may require fewer hues to avoid visual clutter. Carefully tape and paint each section, allowing colors to dry fully before moving on, for a polished, vibrant wall.
How Long Does the Entire Project Typically Take?
The entire project usually takes about 4 to 8 hours, depending on your design complexity and experience. Timing considerations are key, so plan for prep, taping, painting, and drying time. To stay on schedule, break the project into manageable steps and allocate extra time for touch-ups. Good project planning helps guarantee your geometric accent wall turns out just as you envision, without rushing through any stage.
What Tools Are Essential for a Professional Finish?
To achieve a professional finish, you need vital tools like high-quality paintbrushes for clean edges and detailed paintbrush techniques that prevent bleeding. Use painter’s tape meticulously to guarantee sharp lines, and select a cohesive color palette for effective coordination. A level and ruler are also essential for accurate pattern placement. With these tools, combined with your skillful techniques, you’ll create a sleek, polished geometric accent wall that looks professionally done.
Conclusion
Now that you’ve mastered this DIY geometric accent wall, your space will look like a modern art masterpiece—think Picasso meets Pinterest. With simple tape tricks, you’ve transformed plain walls into a stunning focal point, proving you don’t need a magic wand, just a steady hand and a little patience. So go ahead, celebrate your handiwork and enjoy your newly styled room, because, as they say in the Old West, “a good paint job is worth its weight in gold.”