
To use peel-and-stick wallpaper without regret, start by preparing your wall thoroughly—make sure it’s clean, smooth, dry, and free of dust or grease. Measure carefully and cut your panels slightly longer than needed. When applying, peel back the backing slowly and press the wallpaper from the center outward using a smoothing tool to prevent bubbles. Work steadily, adjusting gently if needed, and inspect your work as you go. If you’d like to master flawless application, keep exploring these tips for perfect results.
Key Takeaways
- Thoroughly clean and smooth the surface before application for better adhesion and a professional look.
- Measure carefully and cut panels slightly longer to allow for precise alignment and adjustments.
- Align wallpaper carefully, work from the center outward, and smooth out bubbles immediately for a flawless finish.
- Reposition sections gently if needed, avoiding stretching to prevent pattern distortion or peeling.
- Inspect the final result, ensuring all bubbles are smoothed out, and enjoy your well-applied, regret-free wallpaper.
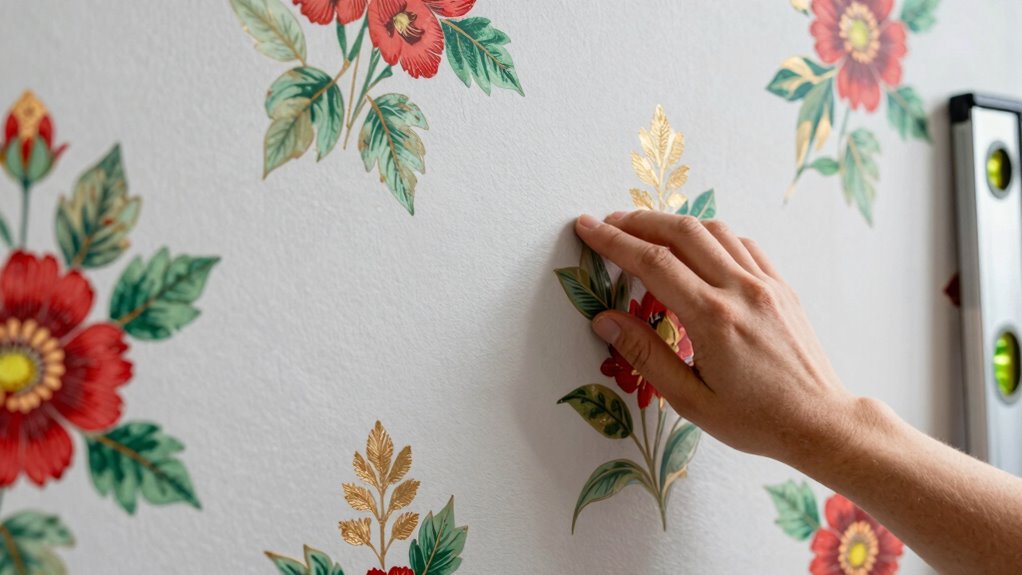
Thinking about updating your space with peel-and-stick wallpaper? It’s a great way to add personality without the mess of traditional wallpaper. But before you get started, it’s important to understand the key steps to *guarantee* the end result looks polished and you don’t end up regretting your decision. The first thing to focus on is proper surface preparation. You want your wall to be smooth, clean, and dry to make sure the wallpaper adheres well and stays put. Begin by removing any existing wallpaper or paint splatters, which can interfere with adhesion. If you’re dealing with old wallpaper, take the time for wallpaper removal, using a steamer or a wallpaper stripper if needed. Once the surface is clear, wash the wall thoroughly to eliminate dust, grease, or residue that could cause bubbles or peeling later. After cleaning, let the surface dry completely; moisture is the enemy of good adhesion. If your walls are uneven or have cracks, consider patching those areas with spackle or joint compound, then sanding smooth. A smooth surface is *vital*, because any bumps or imperfections will show through the peel-and-stick material, making your project look less professional.
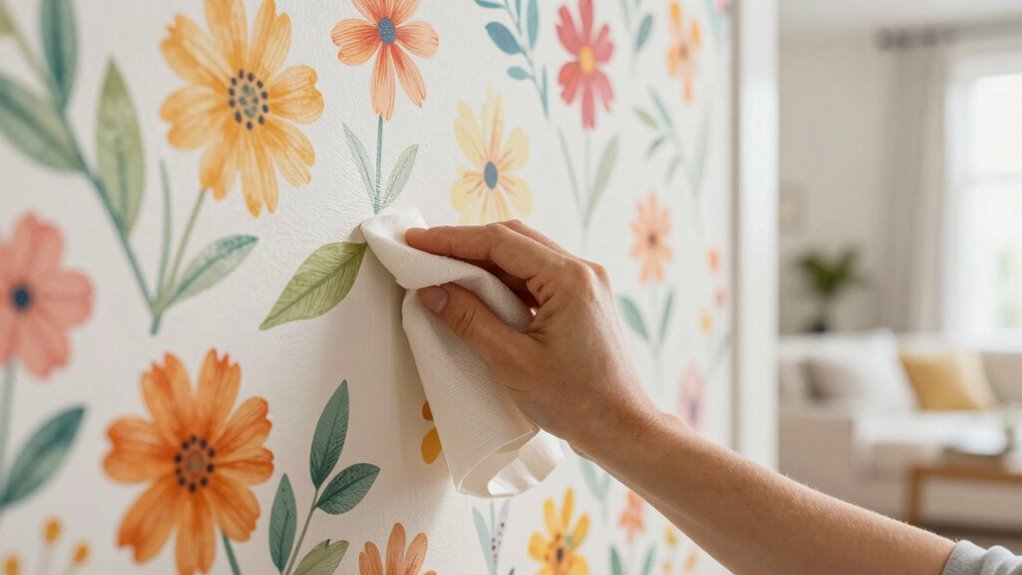
When you’re ready to apply the wallpaper, measure carefully and cut panels slightly longer than needed, so you have some margin to work with. Peel back the backing slowly, starting at one corner, and press the adhesive side onto the wall. Use a smoothing tool or a plastic card to press out air bubbles as you go—working from the center outward ensures a snug, bubble-free finish. Take your time with alignment; once the adhesive touches the wall, repositioning can be tricky. If you make a mistake, don’t panic—gently peel back and re-stick, but avoid stretching the material, which can ruin the pattern or cause it to peel later.
Throughout the process, avoid rushing, and keep a steady hand. If you need to adjust or reposition sections, do it quickly before the adhesive sets completely. After application, smooth out any remaining bubbles or wrinkles. Remember, proper surface preparation is *essential*, because it directly impacts how well the wallpaper sticks and looks over time. When you’re done, step back and inspect your work. Well-applied peel-and-stick wallpaper can transform a room effortlessly. Just *make certain* you start with a clean, smooth surface, and take your time during installation, and you’ll avoid regrets and enjoy your refreshed space for years to come.

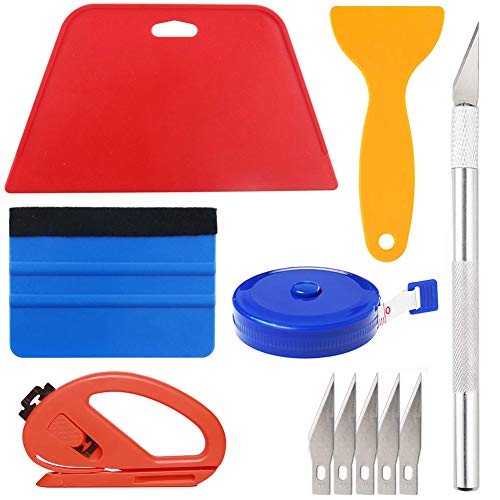
Art3d Smoothing Tool Kit for Applying Peel and Stick Wallpaper, Vinyl Backsplash Tile
【Set of basic tools】: Package includes craft art knife with 5 replaceable blades, red smoother, blue smoother with…
As an affiliate, we earn on qualifying purchases.
As an affiliate, we earn on qualifying purchases.
Frequently Asked Questions
Can Peel-And-Stick Wallpaper Be Used on Textured Walls?
Yes, you can use peel-and-stick wallpaper on textured walls, but proper surface preparation is crucial. First, clean and smooth out any loose debris or uneven spots. If the texture is deep, consider lightly sanding or applying a primer to create a flatter surface. When applying, carefully match patterns to guarantee seamless joins, especially on textured surfaces. This approach makes the wallpaper adhere better and gives you a professional-looking finish.
How Do I Remove Peel-And-Stick Wallpaper Without Damaging the Paint?
Like a cautious artist peeling delicate layers, you gently lift the wallpaper’s edge. Use a hairdryer on low heat to loosen the adhesive, then slowly peel back the wallpaper, working from the corner. To guarantee paint protection, apply a mix of warm water and mild soap underneath if needed, avoiding harsh scrapers. This careful approach minimizes damage, making wallpaper removal smooth and preserving your wall’s beauty.
Is Peel-And-Stick Wallpaper Suitable for Humid Environments Like Bathrooms?
Yes, peel-and-stick wallpaper can be suitable for humid environments like bathrooms if it offers moisture resistance and material durability. Look for wallpapers specifically designed for high-humidity areas, as they resist peeling or mold growth. Guarantee proper application and sealing, especially around edges and seams. Choosing a high-quality, moisture-resistant material helps maintain its appearance and adhesion, making your bathroom stylish without worrying about damage from moisture.
How Long Does Peel-And-Stick Wallpaper Typically Last?
Peel-and-stick wallpaper typically lasts about 3 to 5 years, depending on factors like durability lifespan and adhesive strength. If you choose high-quality wallpaper with strong adhesive, it’ll stay put longer. Proper surface preparation and avoiding excessive moisture can also extend its lifespan. Keep in mind that in humid environments, like bathrooms, the durability lifespan might be slightly shorter, so consider using waterproof varieties for better longevity.
Can Peel-And-Stick Wallpaper Be Repositioned Multiple Times?
Yes, peel-and-stick wallpaper can be repositioned multiple times, making it a great temporary solution for your space. You can easily peel it off and stick it again without damaging the wall or the paper. This flexibility allows you to experiment with different designs and placements, giving you more design flexibility. Just be gentle when repositioning, and avoid stretching or tearing the wallpaper to maintain its adhesive quality.

Roman TEKNAbond Wallpaper Wall Size & Adhesive, Ideal for Paper Mache, Dry Mix, White, 8-Ounce
VERSATILE – Simply mix with water to create a wallpaper sizer, pre-pasted activator, or adhesive for light to…
As an affiliate, we earn on qualifying purchases.
As an affiliate, we earn on qualifying purchases.
Conclusion
So, next time you’re about to stick that wallpaper, remember it’s not just about the perfect pattern but also about patience and prep. Just like finding that missing sock in the laundry, sometimes the best results come from a bit of luck and a steady hand. When you take your time, you might just surprise yourself with a flawless finish—proof that good things often happen when you least expect it. Happy decorating!

Drywall Repair Kit Drywall Hole Repair Patch Kits Wall Spackle Repair Paste with 8.5OZ White Wall Repair Putty with Scraper, Wall Surface Hole Fill Quick and Easy Solution (1Pack)
Complete Repair Kit: Contains 1 pieces repair putty(8.5oz), 2 inch wall repair patches(2pcs), 4 inch wall repair patches(1pcs),…
As an affiliate, we earn on qualifying purchases.
As an affiliate, we earn on qualifying purchases.
Wallpaper Smoothing Tool Kit Include red Squeegee,Medium-Hardness Squeegee, blue Tape Measure,snitty Vinyl Cutter and Craft Knife with 5 Replacement Blades for Adhesive Contact Paper Application Win
Suitable for application of all types of wallpaper application,trimming ceiling,woodwork or baseboard projects,vinyl stickers,vinyl wrapvinyl wrap,window tint or…
As an affiliate, we earn on qualifying purchases.
As an affiliate, we earn on qualifying purchases.