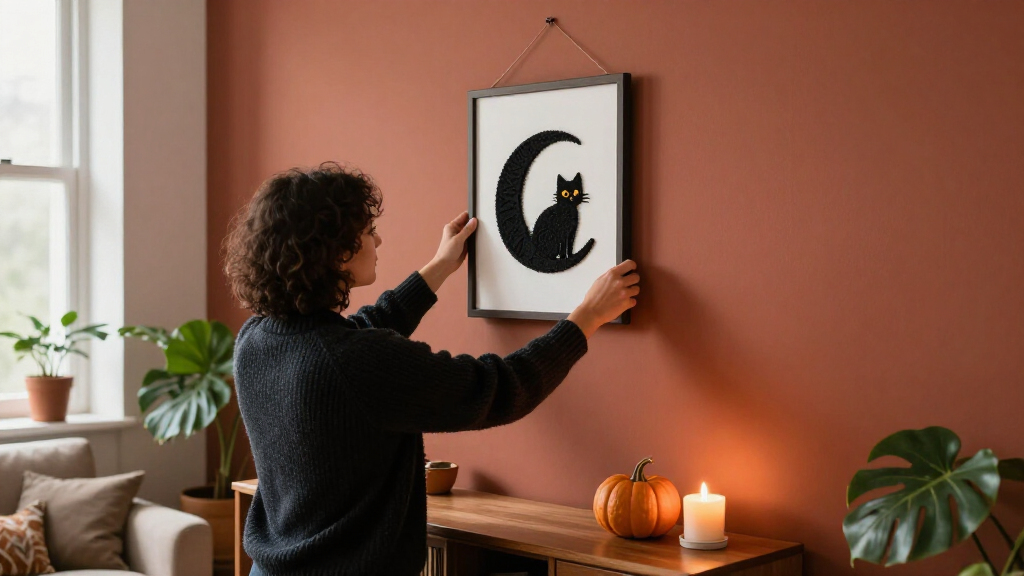
Create a spooky Halloween wall display with cut paper shapes, a contrasting background, and removable wall-safe mounting materials. This beginner-friendly guide is for anyone decorating a room, classroom, or party space without needing specialist art skills. Set aside 1-2 hours, including time to sketch, cut, arrange, and hang the artwork. The finished display can feature a moonlit scene, bats, bare trees, ghosts, or a haunted house.

Get furniture and decor delivered free — and shop member deals
- Fast, free delivery on millions of items
- Access to Prime Big Deal Days deals on October 6–7
- Prime Video, Amazon Music and more included

Whaline 10Pcs Halloween Dark Wall Art Prints, Creepy Witchy Aesthetic Unframed Posters
- ✔ Quantity: 10 prints
- ✔ Sizes: 3 at 8×10 in, 3 at 11×14 in, 4 at 12×9 in
- ✔ Material: Premium paper

Halloween Wall Art – Gothic Haunted House and Pumpkin Print
- ✔ Orientation: Portrait
- ✔ Shape: Rectangular
- ✔ Format: Art print on wrapped canvas

Vodefoad Vintage Cute Ghost Wall Art – Retro Moody Ghost and Black Cat Graveyard Canvas Print, Halloween Decor (8×10 Inch, Unfram…
- ✔ Size: 8×10 in
- ✔ Format: Unframed art print
- ✔ Material: Premium fade-resistant canvas
Difficulty: Beginner | Time: 1-2 hours
What You’ll Need
Tools & Materials:
- Black and colored construction paper or lightweight cardstock
- Pencil and eraser
- Scissors
- Ruler
- Removable poster putty or wall-safe mounting strips
- Painter’s tape for temporary layout
- Optional: craft knife and cutting mat for detailed shapes
- Optional: metallic marker, chalk, or white paper for highlights
Knowledge:
- Basic drawing and scissor skills
- Ability to check whether a wall surface can accept removable adhesive
Choose paper colors and a design before cutting. Check the mounting product’s instructions and test it in an inconspicuous spot, especially on delicate paint or wallpaper. Keep scissors and any craft knife away from children unless an adult is supervising. Do not use an open flame as part of the display.
Whaline 10Pcs Halloween Dark Wall Art Prints, Creepy Witchy Aesthetic Unframed Posters
Whaline earns our top spot because it gives us a collection rather than asking one image to carry the whole Halloween display. Its 10 different prints bring together bats, pumpkins, ghosts, skulls, crows, and other witchy details in a creepy vintage style. With three listed size groups—8×10, 11×14, and 12×9 inches—we can vary the arrangement and spread the theme across a bedroom, dorm, office, or party wall. Compared with the single-scene haunted house canvas, this set offers more visual variety and more room to shape the mood ourselves.That flexibility comes with setup. These are unframed paper prints, so we need to find suitable frames or another display method, and the paper format is less substantial than the framed canvas pick. The product description says the paper resists fading and tearing, but it remains a lighter-duty choice than canvas for a display that will be handled often. This makes the most sense when we want a coordinated wall full of spooky motifs and are comfortable finishing the presentation ourselves.
Pros:
- Ten distinct Halloween and witchy designs give a wall more variety than either single-image pick.
- Three print sizes allow a more flexible gallery arrangement.
- Vintage creepy imagery spans bats, pumpkins, ghosts, skulls, and crows.
- Paper is described as fade- and tear-resistant.
Cons:
- Frames are not included, adding a separate display step.
- Paper is less durable in feel than the canvas alternatives.
- Ten prints may be more than needed for a small accent wall.
Best for: We want a varied vintage Halloween gallery wall for a bedroom, dorm, office, or seasonal party space.
Not ideal for: We need a single finished piece that arrives ready to hang, or prefer canvas over unframed paper.
Bottom line: Choose Whaline when broad spooky coverage and design variety matter more than getting a finished, ready-to-hang piece.
“Choose Whaline when broad spooky coverage and design variety matter more than getting a finished, ready-to-hang piece.”
Halloween Wall Art – Gothic Haunted House and Pumpkin Print
If we would rather hang one strong Halloween image than assemble a gallery, this gothic haunted house and pumpkin canvas has the most straightforward role in the lineup. It is described as a wrapped canvas with a wooden frame and included hanging accessories, so it avoids the frame hunt required by Whaline and Vodefoad. The portrait composition also gives the display a clear focal point in a hallway, bedroom, or living room. Its available sizes range from 6×8 to 24×36 inches, which offers more scale choice than Vodefoad’s fixed 8×10 format.The tradeoff is that its appeal is more narrowly seasonal. A haunted house and pumpkin make the Halloween message immediate, but the listing specifically describes its appeal as limited to Halloween; it has less year-round gothic flexibility than Vodefoad’s vintage ghost and black cat scene. And while the product is described as ready to hang, that convenience does not provide the mix of images Whaline supplies. This is our pick when we want one finished seasonal accent with minimal display preparation, not when we need a whole wall of varied art.
Pros:
- Wrapped canvas and wooden frame create a more finished format than the unframed alternatives.
- Included accessories are described as ready to hang.
- Available sizes span 6×8 to 24×36 inches.
- The haunted house and pumpkin scene gives the wall a direct gothic Halloween identity.
Cons:
- Its seasonal subject may feel less suitable once Halloween has passed.
- One image provides less variety than Whaline’s 10-print set.
- The available description does not specify the precise canvas dimensions selected.
Best for: We want one portrait Halloween focal point in a selectable size and value the stated ready-to-hang format.
Not ideal for: We want art that can blend into decor year-round, or need several coordinated images for a large gallery wall.
Bottom line: Pick this canvas when a single ready-to-hang Halloween scene matters more than year-round versatility or a multi-print arrangement.
“Pick this canvas when a single ready-to-hang Halloween scene matters more than year-round versatility or a multi-print arrangement.”
Vodefoad Vintage Cute Ghost Wall Art – Retro Moody Ghost and Black Cat Graveyard Canvas Print, Halloween Decor (8×10 Inch, Unfram…
Vodefoad takes the smallest, gentlest approach to spooky decor. Its 8×10-inch canvas combines cute ghosts, a black cat graveyard, and dark academia witch silhouettes, giving us a retro, moody scene rather than the broader collection in Whaline or the more overt haunted house statement. The listing says it suits gothic, rustic, and farmhouse styles, and its Halloween imagery is also positioned for year-round gothic decor. That makes it the most flexible choice if we want a little eerie character after the seasonal decorations come down.Its compact size is useful for a shelf-side wall, a small nook, or a frame grouping, but it cannot cover a broad wall by itself. It is also unframed, so despite being canvas, we still need to plan the final presentation. Compared with the haunted house canvas, it sacrifices ready-to-hang convenience and size choice; compared with Whaline, it offers just one image. Choose it for a small accent and its softer vintage character, rather than as the main solution for a large Halloween display.
Pros:
- Fade-resistant premium canvas is a more substantial material than paper prints.
- Ghost, black cat, and graveyard imagery gives the spooky theme a softer vintage character.
- The 8×10-inch format is suited to a compact wall or framed grouping.
- Its stated gothic and dark academia styling can work beyond the Halloween season.
Cons:
- Only one size is listed, limiting placement options.
- It is unframed and requires a separate frame for a finished look.
- One compact image will not provide the coverage of Whaline’s set.
Best for: We want a small ghost-and-black-cat accent that can sit alongside gothic or dark academia decor beyond Halloween.
Not ideal for: We need a large focal piece, multiple coordinating prints, or a canvas that arrives ready to hang.
Bottom line: Choose Vodefoad for a small, moody accent that can outlast the season, provided its fixed size suits the wall.
“Choose Vodefoad for a small, moody accent that can outlast the season, provided its fixed size suits the wall.”
As an Amazon Associate we earn from qualifying purchases.
Before You Start
Measure the area you plan to decorate and decide whether the display will be one large scene or several separate pictures. Leave space around light switches, heaters, vents, and doorways. Avoid placing paper near candles, hot bulbs, or other heat sources. If you rent or the wall has fragile paint, use a mounting method approved for that surface and test it before hanging the full display.
For a balanced scene, plan a simple focal point such as a large moon or haunted house, then add smaller shapes around it. Limit the palette to a dark base plus two or three accent colors so the artwork reads clearly from across the room.
Step-by-Step Instructions
Step 1: Choose a scene and measure the display area
Measure the wall space from side to side and top to bottom. Sketch a rough rectangle on scrap paper and mark the focal point, such as a moon, house, or group of ghosts. Add smaller elements around it, including bats, stars, a crooked tree, or a fence. Keep the drawing simple enough to cut from paper.
Plan where the top and bottom edges of the finished art will sit. Leave clear space around switches, outlets, furniture edges, and walkways. If making multiple panels, mark their approximate sizes in the sketch.
Tip:Large, simple silhouettes are easier to cut and more visible at a distance than many tiny details.
Check: Your sketch fits the measured area and shows where the main shapes will go.
Step 2: Select paper and prepare the work surface
Choose black or very dark paper for silhouettes and a contrasting color for the background. Use lightweight cardstock if the shapes need to hold their form, but avoid thick board if your mounting strips are rated only for light paper. Place scrap paper or a cutting mat on a flat work surface before drawing or cutting.
Gather the adhesive you plan to use and read its package directions. Check its weight limit and surface requirements. Test a small piece in a hidden area of the wall and follow the product’s stated wait time before removing it.
Tip:Use a background color that contrasts with the silhouettes. Black shapes may disappear against a dark wall, so add a pale moon or mount the scene on lighter paper.
Check: Your materials are ready, the paper colors are easy to distinguish, and the adhesive test has not marked the wall.
Step 3: Draw the main shapes
Draw the largest shapes on the back of the paper, where pencil marks will be hidden. Start with the focal point, then draw supporting silhouettes at a scale that suits the wall. Give bats broad wings, ghosts a recognizable rounded outline, and trees a few strong branches rather than many thin twigs.
For repeated shapes, draw one template on scrap paper, cut it out, and trace it several times. Add small details such as windows or eyes only where they will remain visible after hanging.
Tip:Keep narrow sections at least wide enough to survive cutting and handling. Very thin paper points can tear when you lift or mount a shape.
Check: The outlines are visible on the reverse of the paper, and each shape has enough width to cut without breaking.
Step 4: Cut out the silhouettes and accents
Cut along the outlines slowly, turning the paper as needed so your scissors follow the curves. Cut larger shapes first, then trim their interior details. If using a craft knife for windows or small openings, work on a cutting mat and keep your free hand clear of the blade.
Cut out accent pieces such as a moon, stars, eyes, or window panes from contrasting paper. Set finished pieces aside in groups so small shapes do not get lost.
Tip:For a fold-symmetrical bat or ghost, fold the paper lightly, draw half the shape along the fold, then cut and open it. Avoid pressing a hard crease into paper you want to display flat.
Check: The edges look clean from a short distance, and the smallest pieces are intact rather than torn.
Step 5: Arrange the scene before mounting
Use painter’s tape to mark the planned outer boundary on the wall, or lay the pieces on a clean floor in the same proportions as your sketch. Place the focal point first. Arrange larger shapes next, then fill open areas with smaller details while leaving breathing room between elements.
Step back several feet and check that the scene reads clearly. Move any shape that overlaps a switch or looks crowded. If you are creating separate panels, compare their spacing and height before lifting the pieces to the wall.
Tip:Take a quick reference photo of the arrangement. It can help you remember the placement while you mount each piece.
Check: The scene has a clear focal point, even spacing, and no artwork covers a switch or outlet.
Step 6: Mount the paper on the wall
Start with the focal point and work outward. Apply small amounts of poster putty or the recommended wall-safe strips to the back of each piece, following the product directions. Press the paper gently against the wall without rubbing hard, which can wrinkle thin paper or damage paint.
Use a ruler or the reference photo to keep rows and panels level. Add the smaller accents last. If a piece sags, remove it carefully and use another mounting point rather than adding excessive adhesive to one spot.
Tip:Do not mount paper over damp, dusty, or freshly painted areas. Adhesive may fail or mark the surface.
Check: Each shape lies flat, stays in place, and has enough support to resist curling at the corners.
Step 7: Add finishing details and inspect the display
Add optional highlights with a metallic marker or chalk, or place small paper accents over the silhouettes. Keep added details large enough to see from the usual viewing distance. Remove the temporary tape boundary and collect scraps from the floor.
View the display from the doorway and from nearby seating. Check that the arrangement feels balanced, the focal point stands out, and no piece hangs loose. Gently press any lifted corner back into place according to the mounting product directions.
Tip:Keep the design flat and lightweight if people may walk past it or if it hangs above furniture.
Check: The completed scene is visible from across the room, securely mounted, and clear of walkways and heat sources.
Common Mistakes to Avoid
- Making the silhouettes too small or detailed to read from across the room. — Use a few bold shapes, then check their scale from several feet away before cutting the full set.
- Using adhesive that lifts paint or will not hold the paper. — Check the package instructions, test a hidden spot, and use a product rated for the wall surface and the artwork’s weight.
- Cutting long, thin branches or pointed shapes that tear during mounting. — Make narrow parts broader and simplify delicate outlines before cutting.
- Arranging pieces too close together or covering switches and outlets. — Lay out the complete scene first and inspect it from the doorway before attaching anything.
Troubleshooting
Problem: A paper shape curls or falls from the wall.
Solution: Remove it gently, check that the wall and paper are clean and dry, then add support at more than one point using the mounting product’s directions. Replace a warped piece with sturdier paper if needed.
Problem: The black shapes disappear against the wall.
Solution: Add a light paper backing, a bright moon, or a contrasting border behind the silhouettes. Reposition the scene on a lighter section of wall if available.
Problem: Cut edges look ragged or small details rip.
Solution: Use sharper scissors, slow down around curves, and redraw fragile details with wider connections. Cover a rough edge with a contrasting accent if it remains visible.
Problem: The adhesive leaves a mark or begins lifting paint.
Solution: Stop mounting and follow the adhesive maker’s removal instructions. Test another wall-safe method in a hidden spot before continuing; do not pull a strip sharply from the wall.
What Success Looks Like
The task is complete when the display fits the chosen wall area, its main Halloween image is easy to recognize from across the room, and the shapes stay flat and attached. The arrangement should leave switches, outlets, heaters, and walkways clear. No paper should sit near an open flame or hot light source.
Next Steps
Check the display occasionally for loose corners, especially in a busy room. At the end of the season, remove the pieces using the mounting product’s instructions and store reusable shapes flat in a folder. Recycle clean paper where local rules allow. For next year, change the background or add a new focal shape while reusing the silhouettes that remain in good condition.
Frequently Asked Questions
Can I make this wall art without drawing skills?
Yes. Trace simple shapes from a printed template or use cookie cutters and household objects as outlines. Keep the shapes bold and avoid small details that are hard to cut.
How can I hang the art without damaging paint?
Choose removable mounting material labeled for your wall type, test it in a hidden spot, and follow its application and removal directions. Delicate paint and wallpaper may not tolerate every adhesive.
What paper works best for the silhouettes?
Construction paper works for lightweight shapes and short displays. Lightweight cardstock holds its shape better, but check that your mounting product can support it.
How do I make the scene visible on a dark wall?
Put the dark silhouettes on a pale paper panel, add a bright moon or border, or choose orange, white, or purple accents that stand apart from the wall.
Can children help make the display?
Children can sketch, choose colors, and cut simple shapes with age-appropriate scissors under adult supervision. An adult should handle craft knives, wall adhesive tests, and mounting above a child’s reach.
Fall Picks
fall essentials
As an affiliate, we earn on qualifying purchases.